Connecting Your Google Play Account
Linking your Google Play account will enable you to track the following with Appfigures:
- App downloads and revenue
- In-App Purchase downloads and revenue
- Subscriptions revenue, MRR, Churn, and more
- Hourly ranks
- Ratings
- Reviews
- Featured placements
Connecting Your Google Play Account
- Log into your Appfigures Account
- Go to your Linked Accounts by clicking on your name (top right) and then on "Link Account"
- Click on "Link an Account"
- Select Google Play from the list of providers
- Enter the email address and password for your Google account
- Click on "Add"
Important: Once added in Appfigures you must go back into your Google account and follow these steps:
- Go into the 'Recent security activity' tab of your Google account: Notifications
- Check if you have received 'New sign-in' from 'New York, USA` alerts from Google. If yes, open the alert and reassure Google by answering "Yes, it was me".
- Go back to the Appfigures Linked Accounts page and re-enter the credentials for your Google account.
Appfigures will now verify your information and connect your account. You may be asked to verify with Google during this process.
Although your Google account may have access to non Google Play areas, Appfigures will only use the linked account to import sales data for your apps. To restrict access to only sales data we recommend creating a separate Google account with limited permissions, and using it instead of your main Google account.
This is completely optional, but if you'd like to do it this is how:
Creating a sub user in the Play Console
You'll need to have admin privileges to continue with this process.
- Start by logging into your Google Play Developer Console.
- Click on Users and permissions
- Select Invite new users
- Give the sub-user an email that isn't your main email but you have access to.
- Set Access expiry date to Never
- Next, give the new user permissions through the Account permissions tab:
- App Access → View app information and download bulk reports (read-only)
- Financial access → View financial data, orders, and cancellation survey responses
- User Feedback → Reply to reviews

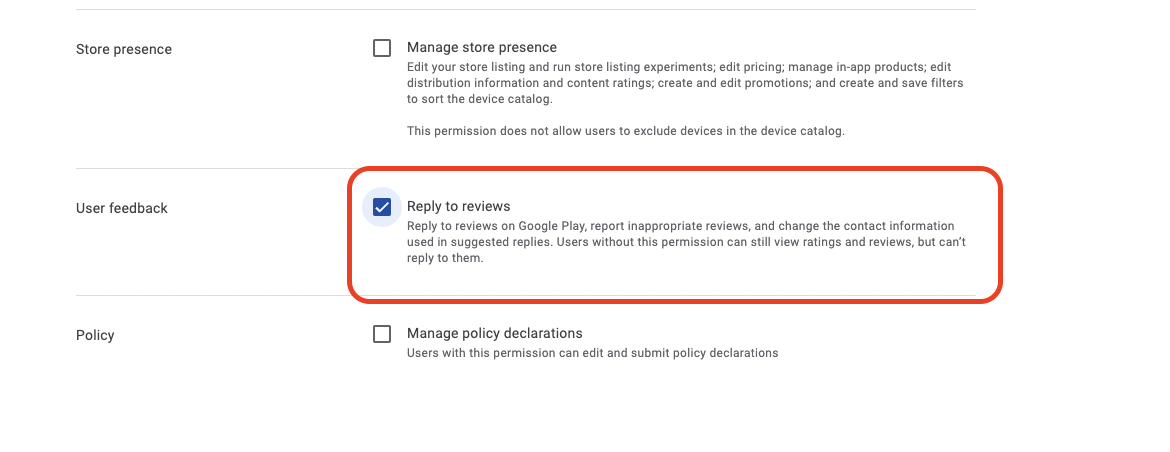
Important: These permissions provide read-only access to reports, so we'll only be able to get reports and won't have the ability manage your apps or banking information.
-
Click on Invite user
-
Check your email. Google will send an email to the address you provided. Follow the instructions in the email to complete the setup.
Google Workspace (formerly known as GSuite Setup)
If you're a part of a GSuite account you'll need to make sure to whitelist the Appfigures app.
You can do that by following these steps:
- Go to https://admin.google.com/ac/owl/list?tab=apps
- Click on "Configure new app" -> "OAuth App Name or Client ID"
- Search for "Appfigures" and select it
- Select all the OAuth Client IDs presented
- Select the "Trusted: Can access all Google services" option
- Click "Configure"
Permission checks to run within Google Workspace:
Allow Workspace users allowed to access Google Cloud Platform
- Go to Apps → Additional Google Services
- Make sure that Google Cloud Platform and Google Play Console are
ON for everyoneor the accounts you would like to link to Appfigures.
With Workspace, you should ensure that Reauthentication is set to allow trusted apps:
- Go to Security → Google Cloud Session Control
- If
Require reauthenticationis set, also setExempt Trusted appsifNever require reauthenticationis set no changes are required.
##SSO Systems Supported When Connecting Google's Developer Account
- Okta
- OneLogin
- Entra ID (Azure)
- JumpCloud
While these four systems are supported fully, any other SSO system should work out of the box as well.